I have come to love hand sewing. It is sometimes quicker and more precise than machine stitching.
I put in all my zippers by hand now, rather than redoing them three times by machine and trying to get it right.
I put in all my zippers by hand now, rather than redoing them three times by machine and trying to get it right.
V-neck shirts are far easier to get balanced when that last critical bit is finished by hand. Mending gets done by hand.
Very fine fabrics are good candidates for hand stitching both to retain a soft hand and so that the fabric is not damaged in case a seam needs to be redone.
There are a few things that come to mind when I think about how hand sewing has become such an indispensable method for me. There are also pitfalls to hand sewing that have proven solutions. In this series of posts I will cover best practices and strategies.
Getting started:
Choose the correct size needle for the project
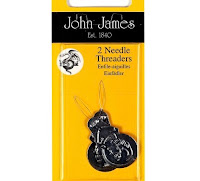
An invaluable tool is a needle threader.
The most inexpensive type has a very thin folded wire that is inserted through the needle eye, threaded, and then is used to pull the thread through the needle eye.
Use a good brand of strong thread.
A good guide to needles and their uses: https://www.jjneedles.com/needles-guide (I'm not affiliated or receiving anything)
The most inexpensive type has a very thin folded wire that is inserted through the needle eye, threaded, and then is used to pull the thread through the needle eye.
Use a good brand of strong thread.
If thread is fuzzy / slubby is is not likely to be good quality. Old thread can become quite brittle, especially if it is exposed to sunlight. Do "snap" test for strength - pull hard on a length of the thread and see if it snaps in two. If it does, use with extreme caution, perhaps only for basting, and generally not in a sewing machine. Cheap thread can also be prone to breakage.
Match your thread to fabric.
There are multiple weights of thread. Most hand sewing is done with a poly or poly blend thread found in any sewing shop. Generally speaking the heavier the fabric, the heavier the thread.
How much thread to use? Prep the thread (optional)
Use a length from your hand to your elbow, no longer, or the thread is more prone to tangling.
Threading the hand sewing needle:
To prevent tangling, hand sewing guru Natalie Chanin, founder of Alabama Chanin, says you should "love up" your thread. Run the thread though your fingers repeatedly so that the thread is smoothed by the oils in your fingers and tension is released. The thread can also be run through a lump of beeswax and then ironed (to remove excess wax) or use a commercial thread lubricant.
Threading the hand sewing needle:
Cut a clean edge on the end of the thread (critical!). Repeat as necessary.
Lick the eye of the needle (be careful). The moisture helps to draw the thread through the needle eye. Alternatively, run the end of the thread through your mouth.
Hold the thread so that just a little tip shows between your fingers. Push the needle onto the thread (instead of the thread though the needle). When just a bit of thread has gone through the needle, grab it and pull.
If these things fail, recut the end of the thread and try again. Also try using a threader as mentioned above.
This older book is an excellent source for hand sewing techniques from one of the queens of couture sewing, Susan Khalje:
More posts to come:
- Knotting the thread
- Sewing with a single strand
- Sewing with a double strand
- What to do when the thread twists/knots up
- What to do when the thread gets a loop
- What to do when the thread knots are impossible to fix
- When to stop stitching and finish off the thread
- What to do when running out of thread
- Running stitch
- Back Stitch
- Hem stitch
- Blind stitch
- Blanket stitch
- Prick stitch
- Example: zipper installation by hand
Michelle is an upcycle sewing guru and designer for Paganoonoo, publisher of upcycle sewing instructions. www.paganoonoo.com


No comments:
Post a Comment