Wednesday, November 29, 2017

Holiday Cut Out Cookie Recipe - Paganoonoo

My Grandmother Luff's cutout cookie recipe is the best I have ever tasted.  We make them every year and it is my fondest holiday tradition!  Theses beauties were made by my grandchildren last year.

What Michelle, you may say, does this have to do with upcycled fashion?  Not much. However, there is an opportunity to upcycle...

As the children and grandchildren grow and move out I've been making them cookie kits - the recipe, thrifted (and cleaned) cookie cutters - aprons - oven mitts, all packed in a shoebox or large glass jar so they can carry on the tradition.  I share this with you so you can not only make the cookies but make these gifts for others.

Grandma Luff's Christmas Roll Out Cookies

Equipment:
·       Heavy duty mixer (the dough is stiff)
·       Rolling pin
·       Cookie cutters
·       Large flat surface to roll on, or use a big cutting board w/ a wet towel under it to keep it still
·       Cookie Sheets, optionally lined with parchment paper
·       Rolling pin
·       Plastic wrap

Ingredient List
·       4  sticks of salted butter (1 lb)
·       1lb box of powdered sugar a.k.a. confectioners sugar
·       7 cups of flour
·       4 eggs
·       1 teaspoon cinnamon
·       1 teaspoon baking soda
·       Sprinkles for decorating

Cookie Dough Directions
Start with room temperature butter, soft but not melted.
Using a heavy duty mixer,
  • Combine 1 lb butter and 1 lb powdered sugar until creamed
  • Add 4 eggs, and mix well

In a separate bowl, a
dd
  • 7 cups of flour, 1 tsp cinnamon, 1 tsp baking soda


Mix well*
Note*: Add the flour to the mixer  ~ 1.5 cups at a time, mixing after each addition. The dough will be stiff.
The dough needs to be refrigerated prior to rolling it out.  
  • Divide it into rectangular wedges (like a deck of cards) about 5" x 4" x 1" and wrap it well in plastic wrap. and refrigerate at least 5 hours and up to 2 days.  

The dough also freezes well if precautions are taken to avoid freezer burn, thaw in the refrigerator only.
Rolling and Baking
Place a cup of flour in a shallow bowl & use it for dusting the rolling surface, dough, rolling pin and cookie cutters to prevent sticking
Let the dough warm slightly
Lightly dust the rolling area with flour
Roll the dough out evenly, about 1/3” deep.  Roll in one direction and them the other with gently pressure so the dough doesn't crack.
Note: If cookies are varying heights they cook at different rates
Cut out the cookies with dusted cookie cutters
Place cookies on a (optional: parchment lined) cookie sheet with enough room between to allow for some expansion.
Bake at 350° until golden on the edges, ~ 11 minutes depending on thickness
Lay cookies on wax paper to cool 

Frosting
1 lb powdered sugar
1 cube (1/4 lb) salted butter
1 tsp vanilla extract
1/3 cup milk to start.
Start with room temperature butter, soft but not melted.  
Cookies must be cooled off to room temp before frosting.
Using a mixer cream butter and sugar.  Add vanilla.  Add a splash of milk at a time and mix until the frosting is a little thick but still spreadable.  It's really hard to come back from adding too much milk!

Spread frosting on cookies and sprinkle right away - do this over a cookie tray to catch sprinkles.

Allow the frosting to dry completely if you are going to stack them and layer in wax paper if possible.

I hope you enjoy them as much as we have.  

Happy Holidays!

Michelle Paganini

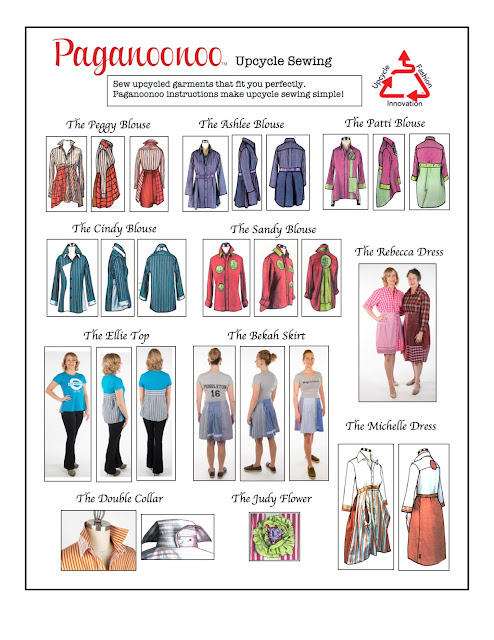
P.S. if you sew, check out the rest of my blog to learn about Paganoonoo's upcycle sewing instructions. 


Sunday, November 26, 2017

Noel Dress - Holiday version with Reindeer applique


For those of you who do not already know me, I'm Michelle Paganini and I run an upcycled fashion design company, Paganoonoo.  This post is about a upcycled dress design under development.
Continuing from the first "Noel" post, here is prototype #2. 

This time I decided I wanted a cheery red dress.  

After combing through my dress shirt stash and several trips to the thrift store I had 5 shirts in matching reds.

I love the pattern and color combinations and it certainly looks cheery.

This is the finished dress.  I was all dolled up as we went to a winery and then out to lunch.


Here is the in-process version.  Test pinning the placement of various patterns / colors helps to maintain balance in the design.  I also tried out a couple hemline lengths and choose knee length again.  

Because the bottom of the dress retains original shirt hems it is curvy, dipping at the shirt tails and rising at the side seams.  In the first picture you can see I chose to wear a petticoat for full knee coverage.
  I made mistakes galore even though I had the original dress in the room for reference. I cut all the way through the front placket, forgetting that on the original dress it stops shy.  After having carefully matching the colors on 5 dress shirts there was no giving up.  Pressing onward, a quick zig-zag and the two pieces were back together.  As always, I stuck myself and bled, marking the garment with a bit of DNA.  BTW your own spit will remove your bloodstain. On to major mistake number two.
I accidentally cut a huge hole in the back panel, darn!  Because the cut is in a single layer of fabric it needed backing before using a multi-step zig zag closure.  The backing prevents strain on the top fabric which would pull apart during use and laundering. There was red thread in the top and yellow in the bobbin making the repair stitching quite visible on the backside. 

Shhh, the repair still looks like this but no one has noticed.
Back to that accidental cut across the placket... I'm always looking for a way to make mistakes into features.  I had purchased reindeer made from a cutter quilt (one too badly damaged to use as a quilt) and was planning to add them to scarves, however they made the perfect (festive) mistake cover-up and add so much charm to the dress. Sewn on by hand, they can be removed at the end of the season and sewn back on next holiday season.

 
Last but not least these upcycled shoes were painted red following the www.sassyfeet.com method.  With new red shoelaces they are the perfect accent.

Look for release of "Noel" dress upcycling instructions in the new year.  In the meantime I will be making a few more examples (before starting in on illustrations and writing instructions) and will post them on the blog and Facebook. Follow Paganoonoo on FacebookInstagram, and Pinterest, and Michelle on Facebook.

See a New Years Eve silver version here.

To receive a free tip sheet and be notified of new releases please join our mailing list.   

Start upcycle sewing today!  Join the Paganoonoo Upcycle Sewing Group on Facebook.  Released Instructions (PDF and hard copy) are for sale in the Etsy Store.


Wednesday, November 22, 2017

New Paganoonoo design: the "Noel" dress

NEW UPCYCLING INSTRUCTIONS: NOEL DRESS

For those of you who do not already know me, I'm Michelle Paganini and I run an upcycled fashion design company, Paganoonoo.  

Being a Jill-of-all trades, I not only develop upcycled fashion designs and write patterns/instructions, I handle most other aspects of the business too.  

This means spending much of my time doing things other than designing (like writing blog entries.)

Don't get me wrong, I love, love, love what I do.  And, sometimes I need to stop doing administrative type activities and design something new to re-energize myself, regardless of what is on my to-do list.  

This is how the "Noel" design was developed.  One day I craved something new, comfortable (for me a dress), super cute and from my favorite garments for upcycling - men's shirts.

I went in the studio and started draping on my dress form, looking to make something different than my previous designs.  
No pictures taken along the way as I didn't know how it would turn out.   

I LOVE the results!  I find myself wanting to wear this dress every day.  It's comfortable, flattering, feminine.  I love the color blocking and the fact that I used pre-hemmed pieces for most of the color blocking.  
The hem is scalloped because the dress shirt bottoms are curved higher on the sides.  

With the longer pieces in the front about knee high some of the up-curves felt too short for me.

Adding a white sleeveless lace-hemmed summer dress underneath to act as a petticoat makes for an even overall hemline. Perfect!

One bit was really short so it was filled in with lace that's been in my stash since the movie Out of Africa was released, LOL

Super pleased with the results and compliments I received when wearing it out in public, it became clear that this design would be a great addition to the Paganoonoo collection. 

The process of developing written and illustrated upcycling is lengthy (outlined in this post), and begins with making enough prototypes to develop consistent and efficient methods for producing the same results.  


MORE!
See a red holiday version in this post.
See a silver New Years version in this post.


Happy upcycling!

Michelle
Start upcycling today
with already released
Paganoonoo upcycling instructions! 

 To link to other Paganoonoo Social Media
or join the mailing list (never shared!) click here.

Saturday, November 18, 2017

Upcycled Boro Style Jean Jacket #2, Part 2

I'm continuing to develop upcycling instructions for this jacket design.  
This is where the last post left off...
Michelle Paganini working on her upcycled boro style jean jacket.
The light section is too large

Bias cut denim
With me contemplating the back of the jacket and starting to make adjustments to create a better balance of lights, mediums, and darks.  The original back had a very large light blue section and it was just too much.
I added more dark sections on the right side and continued to create the collar by wrapping bias pieces around the collar band.
Here is the inside.  As you can see the collar bands don't necessarily wrap neatly to the inside.  This can be fixed later and at the end I will use bias tape to finish the edge on the inside.
In the sequence below I am experimenting with  various light dark combinations.
Not my favorite,  doesn't seem flattering.
I like the circle better but it seems too small.
I like the larger circle and it seems like the balance could be even better.  The focus is a bit top heavy with most of the darker section on the top half of the garment.  Great if you want to emphasize shoulders but that is not my goal.  I had intended that this garment work for a woman who prefers more of an hourglass curvy type of design emphasis.
This is the final configuration I chose.  I like the circles almost "appearing" out of the arrow shape above.  I like the graduated size of the circles, smaller to larger, and angled to one side, mimicking a waist to hip transition.
I sewed the circles on by stitching around each one three times.  It looks arty and keeps the process easy as there is no need to try to get a single stitch line just perfect.  
Final version #2 of Paganoonoo's upcycled boro style jean jacket: 3/4 Back View.  The balance looks fantastic from this angle!
I added on a closure by cutting up a man's belt and sewing it on using a jean needle and going very, very slowly.  It skipped in a couple places so I brought thread up from underneath by hand to pull it back down again. Also left beginning and ending threads super long so I could bring them to the back by hand secure them.
Final version #2 of Paganoonoo's upcycled boro style jean jacket: Front View
Final version #2 of Paganoonoo's upcycled boro style jean jacket: Back View.
A couple friends agreed to model.


Thank you Claire and Barb! 

The cycle for developing upcycling instructions / patterns for sale starts with 1) an idea / new design and then 2) 3-5 prototypes until I've developed consistent and reproducible methods, then 3) photographs of each step, 4) turned into line illustrations, 5) written instructions, 6) proofing, 7) pattern testing, etc.  As you can imagine it takes months to complete the cycle.  My commitment is that when you purchase Paganoonoo designs, you have been set up for success!

On to #3 and #4, I already have two more waffle robes lined up, one blue and one Kermit the frog green, LOL. 


March 2018 update:
Upcycling instructions now available for this jacket!!


Happy Upcycling,

Michelle
Start upcycling today
with  Paganoonoo upcycling instructions!

To link to other Paganoonoo Social Media click here.

P.S. If you would like to be on the Paganoonoo mailing list, never sold or shared, and see new example garments, get links to my video tips, hear about sales, new patterns and events, please click here.

Sunday, November 12, 2017

Upcycled Boro Style Jean Jacket #2, Part 1

I've always found used jeans irresistible, the velvety softness they get over time, the fading indigo dye. 
 

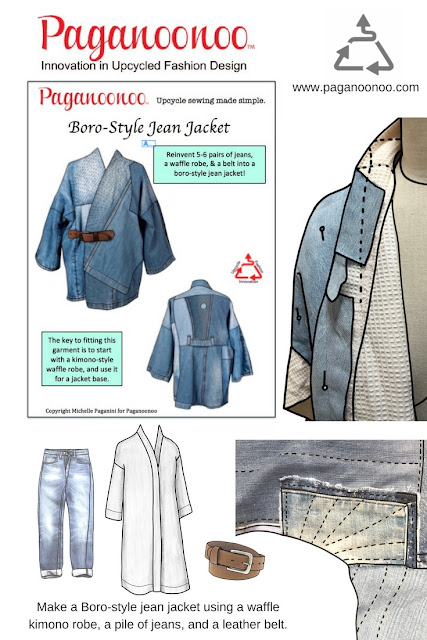
You may have seen my original boro inspired upcycled kimono-style jean jacket on this blog (post 1), (post 2), or on Pinterest. 

I made it for an upcycling contest at the Canada College fashion department a couple years ago.
Many folks have asked if I sell the jackets and/or instructions.  I've only made one jacket so far and have not sold it.  I am planning to develop written instructions and video class.  I've started jacket #2 and am beginning the process of instruction development.

Developing a pattern/instructions, written or filmed, so others can make your design begins with sewing the newly developed design 4-5 times to find consistent and simple methods for construction. 
Once that is done I begin photographing every step and making a written outline.

Here I'm auditioning a belt for the new jacket.  The leather needs to be a bit supple or it cannot be sewn through.  You can see that I have a collection of jeans in various stages of age/fading.  I prefer 100% cotton or as close as I can get.

The next key supply is a waffle kimono robe. 
I use the robe as a base to build on. 

They are surprisingly hard to find in my local thrift stores.  My niece suggested checking with local hotels for their discarded guest robes - brilliant!
 Me upcycling in the studio.  I have the luxury of a dedicated room for Paganoonoo work.
The neck area is curved so I've used bias cut strips in order to mold to kimono's shape.

Notice the  pocket-stitching outline on the right shoulder? 

When jeans are disassembled variations in the indigo color show up.


For me, the toughest part of designing the jacket is deciding on placement & proportion of lights, mediums, and darks, and making certain the end result is a pleasing arrangement.
 Although the light section on the back is already sewn on in a grid pattern, I'm not liking it.  Going to try something different.  My seam ripper got a workout.

You can see here that some of the back section has already been removed. See the follow-up post here.


March 2018 update: 
Upcycling instructions now available for this jacket!!
 
Paganoonoo = upcycling made easy!  

Start upcycle sewing today with Paganoonoo's upcycling instructions.

Happy upcycling,

Michelle