Friday, November 27, 2015

Clever, Charming and Easy Hostess Gift - only 3 seams!!!

Are you like me - with a stash of vintage linens you could not resist but you aren't sure what to do with them?  (or you could get your hands on some)...

And you would love to give homemade gifts but don't feel you have the time?  I have a solution:


One day when I was packing for vacation and putting my shoes in a plastic bag for the suitcase it occurred to me that there was an opportunity to use something much nicer to hold my shoes.

So I rummaged through my vintage linens and realized that some of the dresser scarves were ideal candidates for shoe holders. 
This dresser scarf looked promising.

I checked the sizing out by placing the shoes on top.  Just enough width, detectable by the appearance of extra room on both sides of the shoes.  A bit long, and long is fine, width is critical.

Press the dresser scarf well as wrinkles will distort the shape.  
Then pin the sides and mark the center line.
This is important - start with the middle seam, and begin sewing from the open end.  The reason for this is so that the open ends don't end up at different lengths.  Unless you have a walking foot on your machine all the time the feed dogs will shift the fabric slightly as you sew.  

Then sew the sides closed, also starting from the open end.  Clip the threads and you are done.  Only 3 seams!!!!  Yeah!!!

Slip the shoes in.  

Wouldn't that be much more pleasant to pack and unpack?  
Mine bring a smile to my face every time I use them.  

When I've given these as gifts the recipients are delighted.  
With all the different sizes of vintage linens it would be easy to make these for men and children's shoes too.  

Happy Upcycling!  Michelle

P.S. - Check out Paganoonoo upcycling clothing patterns here.


Thursday, November 19, 2015

My New Favorite Patti Blouse

I have a new favorite version of the 

I found a wonderfully soft dress shirt in this lovely pale aqua 
and fell in love with the texture, drape, and the color. 
Then I was lucky enough to find a silky soft cotton skirt lined with SILK! in complimentary colors. I know, Amazing.

So I substituted the skirt for the back panel and left in the yummy silk lining. 

The double collar added a third fabric.

Then I went crazy with my fabric scraps from other projects and embellished the front with a collection of circles sewn on with free-motion stitching, leaving off the pattern pocket and stripe.
As you can see I left the back section (skirt) quite long making the blouse a bit dramatic and eye catching.

And here I am wearing it with an upcycled skirt.  The skirt was originally a Britex knit fabric blouse I made from that never quite fit right.  The fabric was quite expensive so I wanted to re-use it.  Turned out all I needed to do was cut off the shoulders, sew up the side seam closing the arms holes,
and add a bit of elastic. 


 For size reference I am a truly average American woman, 5' 6"and a size 14.  I am also pear shaped. This blouse is quite loose (I like loose) and would accommodate a much larger and taller person.  

Happy Upcycling!  Michelle

Patti Pattern available for purchase here

Wednesday, November 18, 2015

Puyallup sewing expo, Paganoonoo will be exhibiting!

I received great news!  I will be teaching a class on upcycling at the National Sewing and Stitchery Expo in Piyallup WA the last weekend in February 2016!  Expo website  Paganoonoo will also have a booth selling patterns and perhaps kits.

 If you haven't been it is a huge and amazing show with 4 day roster of classes running non-stop and every sewing supply you could possible imagine and many you may never have heard of before.  I hope to see you there!  More details come come as I learn them. 

Friday, November 6, 2015

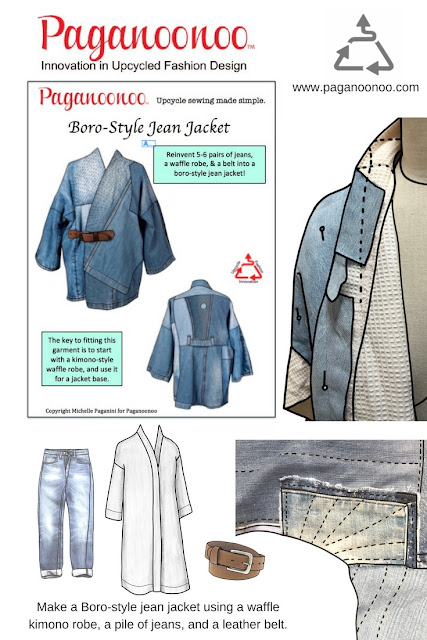
Magical Boro Inspired Jean Jacket with Belt Closure

Hello, I'm Michelle Paganini a fashion designer addicted to "upcycling", transforming existing goods, such a clothing, into something more desirable than the original materials.


This upcycled jean jacket was inspired by Japanese Boro clothing.  I find the utilitarian nature of the garments appealing and the patchwork and repair process fascinating.  

I ran across a white waffle robe with a Stanford University logo and thought it would be a good foundation for building a kimono jacket. I did not have garments that need extensive repair, but did have jeans in different stages of life.  I decided to use them to build this Boro inspired jacket by piecing them together on top of the waffle robe. 

The rugged nature of the jacket called out for a complementary closure so I used part of a man's belt. 

Read more about the process in the original post

I'm featuring the garment again because my husband George 
just took professional photos from all sides. 

The thing that is amazing, even magical about this jacket is that it looks good on such a wide variety of people.  I wish I'd taken pictures of all of the men and women who have tried it on and it seemed to look just right on large, medium and small people of both sexes. I will get some pictures of it on folks in the future.

I really love the subtle color blocking from the 
different shades of the jeans.


The circle on the upper back is to hide an ugly a grease stain. 
I always try to turn a stain into a feature, LOL.
Here is the inside front of the jacket.  The original waffle robe lining only extends part way down the sleeve.  This is so the bottom of the sleeve does not become too stiff and retains fluid movement. A pocket was added using an original jean back pocket.  The red stripe is bias tape used to finish off the join between the lining and jacket facing.
Here is the inside back.  You can see all of the sewing
attaching the pieces and quilting the sections.

Look at customer examples here.

Upcycling instructions available for this jacket!!


My goal is to make upcycling designs flattering, simple to make, and accessible to home sewists! 

Happy Upcycling!

Michelle

Wednesday, November 4, 2015

Upcycled Holiday Gifts

Some of you have already completed your holiday shopping. Some of us have barely started.  I often have an itch to make the presents but rarely can follow through. However, this year I stumbled on...
embellishing a scarf as a fairly easy upcycled present for a woman, man or child.  

My local thrift stores seem to have a wealth of pashminas, wool, cotton, and cashmere neck scarves.  I check every time I go and have built up a collection.  

For embellishment, I've been screening the skirts (and some garments) for designs I can cut out with pinking shears and then hand or machine sew onto the scarves. 

As usual, I wash everything when I get it home (regardless of care tag instructions) and if it survives I use it.

In this case I found a cotton skirt with beautiful embroidery on a rich purple background.  I've already harvested some of the embroidered bits.
Here you can see the bits I added onto a cashmere scarf.


I sewed each piece on by hand with a running stitch.  I matched the thread to the color of the scarf so that the stitching on the back side would barely show. The purple pops on the pale green background. 

This scarf reminds me of painted easter eggs.  It sold in August at the San Jose Quilt Museum gift shop.  I hope the new owner is enjoying it!

Tuesday, October 27, 2015

Dealing with stains - An upcycled Paganoonoo Patti blouse with a trick, plus tablecloth garment

Sometime you find a great textiles, but with stains. 

These two starting garments may not look like much, but both are beautifully soft.  The embroidered one is linen and the other cotton. 

The linen has a slightly iridescent quality.  

The cotton one simply will not wrinkle. 

One of the things I love about upcycling is that you know exactly how the fabric will behave because it's already been cleaned many times. 

The color combination is a subtle play on this one shade of green.  

I liked the combination so much that I broke my three fabrics rule and just used these two starting garments.  

I decided to upcycle the garments using the Paganoonoo upcycled sewing tutorial for the Patti blouse as I wanted to show off the embroidered linen in the back panel. 


 What you don't see is the stains on the linen garment, grease spots and slight bleaching in some parts. 

I decided to make a feature out of the problems. 

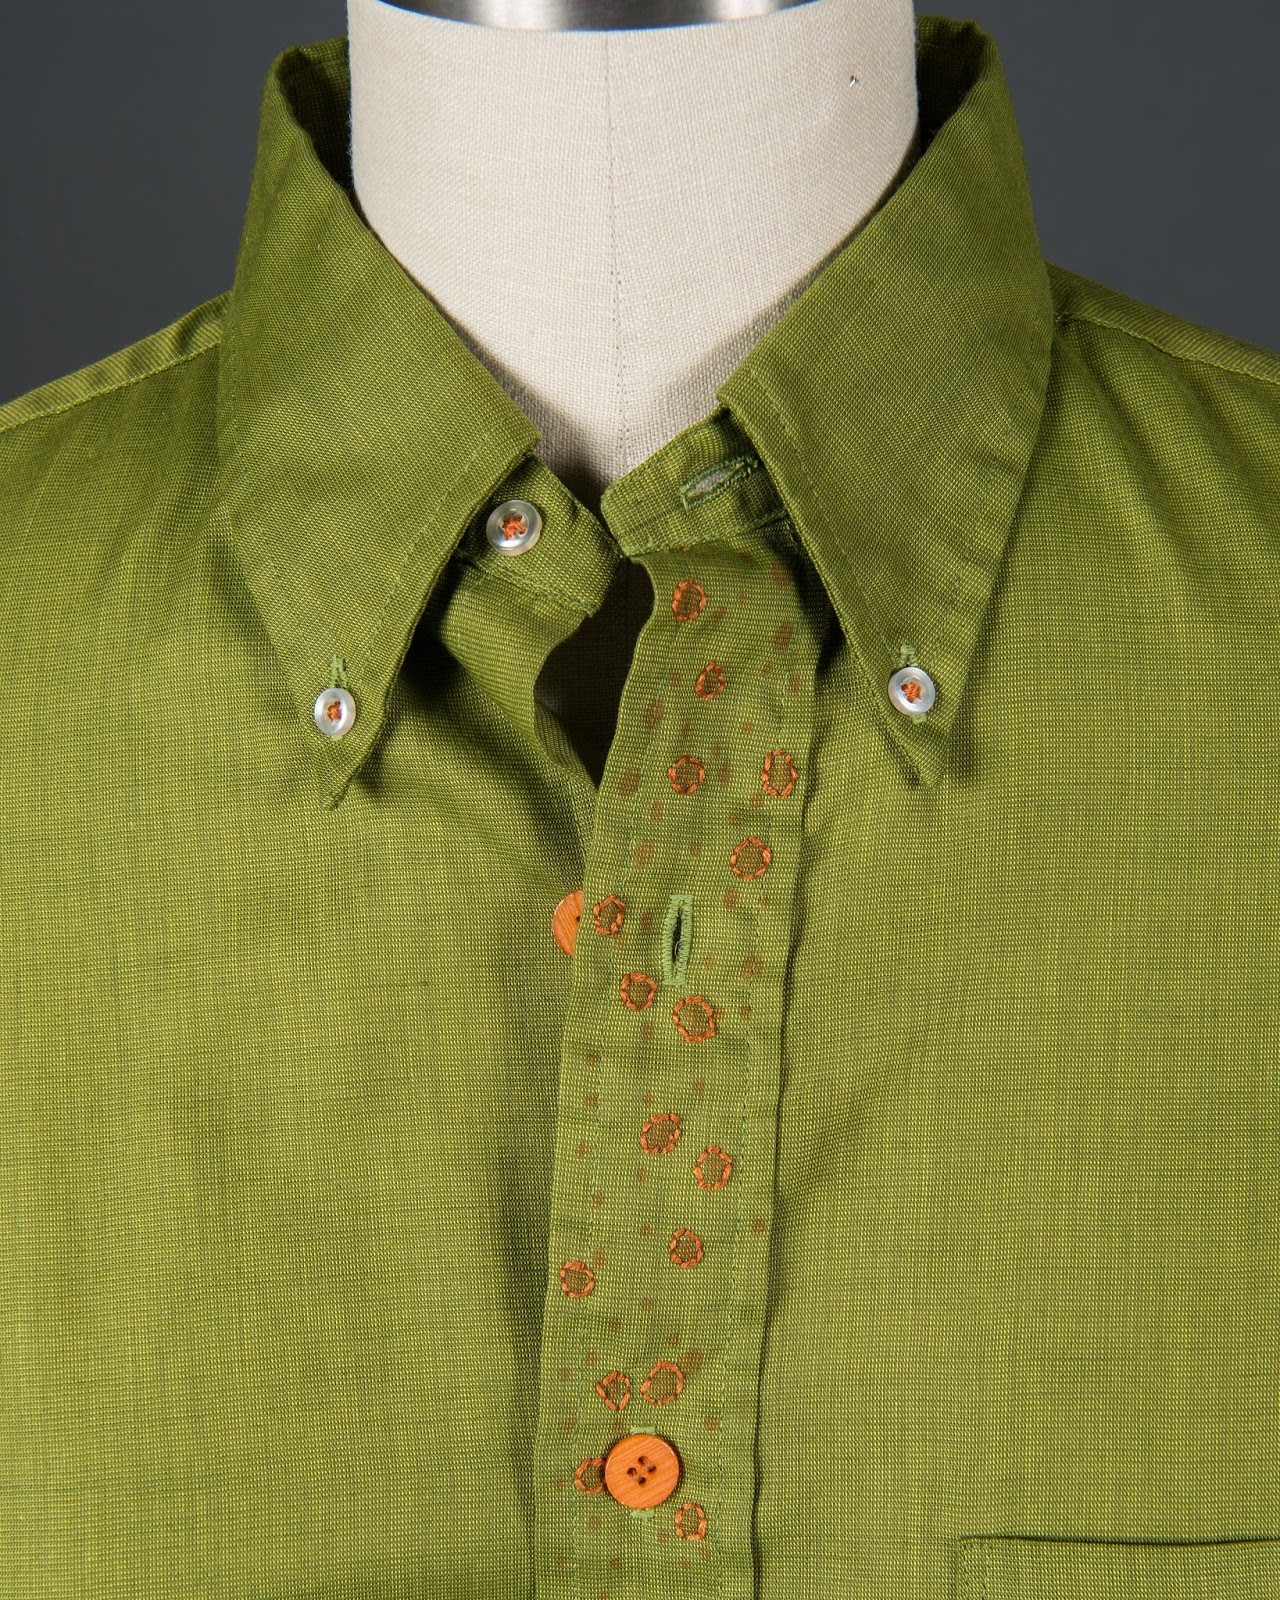
On the cuffs an embroidered stitch is placed around the lighter spots. The shapes are organic and I really like them as a "feature". 

The color of embroidery thread is deliberately chosen from the other side of the color wheel to create excitement. I added a couple non-functional buttons for interest.  


I also used fabric pens to add in dots, making it more like a patterned fabric. 


The same (upcycled) buttons are on the front.  I did not have the smaller size buttons so I used orange thread on those buttons to tie in the color. I also repeated the dots down the placket.
The grease spots are hidden in plain sight by wide circular bands around the stains using the fabric pen. Looking closely it is really impossible to see the difference in color between the stained parts and the rest of the fabric. 
I ended up with a much more interesting garment than it would have been without the stains as features.  Plus I really ended up with a third fabric through the embellishment. 
Love the shape of this blouse?
Make your own! Our tutorial instructs you on how to add hip room to a standard men's dress shirt. No pattern needed.

 Paganoonoo upcycle sewing tutorials are available on Etsy. 

Get 25% with code HIDESTAINS

Used this technique again on a vintage tablecloth:


Happy upcycling , Michelle Paganini

Thursday, October 15, 2015

Sedona and the color wheel

We are in Sedona, one of the most beautiful places I have ever seen.  The soil is a luscious orange/red and the plants lean towards a sage green. 

I've been reminded as I look at the landscape what a powerful combination colors on the opposite side of the color wheel make.  The landscape practically vibrates. 

George, as usual, has been taking stunning shots so I can share this amazing phenomena with you.


When planning a color blocked upcycle garment you'd like to be an attention grabber, use colors from the opposite side of the color wheel.  


 These photos barely do justice to seeing the colors in person.  I've seen southwest color combinations many times but feel like I've never really understood them until now.  

Saturday, October 3, 2015

This fall colored beauty is from the Patti Pattern.
The front is straight off the pattern design.


In the back I could not resist a bit of Origami-like work incorporating a tie (pre-washed of course).  Note on the far left there is a collar point sticking up.  I really love the overall effect.
 A Judy Flower adds a bit of interest to the front. 


This particular version was made for a very tall friend, over 6 ft., who has a difficult time finding clothing on the right scale. The back is dramatically long on this version.  It is also purposely asymmetrical.

The pattern gives instructions for how to modify the length of the drop in the back to short, medium, long or in-between.  


Seasons changing!

We are in the middle of a terrible drought in California.  Trees are in distress, lawns are brown and it's been very, very hot.  

So...when it rained for a short time a couple days ago I shouted YAHOO!  And now the weather finally feels like there is a bit of Fall in the air. 

So today I have on a flannel shirt (yummy) and lentil soup on the stove (double yummy).  I'm thinking about what pattern to work on next.

I don't know about you but flannel has been catching my eye lately. I've been dreaming of a nice comfy calf length dress, a variation on the Peggy pattern, done up in red flannels.  With a pair of boots I'd be all set for football games, holiday events, and running errands in style.  At home with slippers - perfect for TV and hand stitching.

So, that is my target.  A dress with the upper part like a Peggy blouse and a special twist on the bottom.  


Wednesday, September 9, 2015

More use of advanced illustration class skills

George and I are working on a graphic for the Puyallup 2016 Sewing Expo.  It's possible I may be a speaker (yeah!) and I need to send in a graphic for the catalog
 in case I get in.  


Update 17Nov15, I'm in!  I'll be teaching and have a booth. Look for the final image in the Expo catalog to find my class.

Ann Sagawa, my contact, suggested a combination of Paganoonoo pattern, starting shirts and finished garments.  Great idea!
George, with his extraordinary photography skills
captured all the elements.

However when the graphic is shrunk to the catalog size 
(smaller than this) the shirts get a bit lost.


So I decided to try an outline around the shirts and blouse.
which helps some... but still seems to blend in a bit too much.
So I thought a background from the opposite side of the color wheel might help.  It does, but is a bit too light.

So I darkened the background just to get the feel
of how it would look.  I also darkened the line around the pattern. I like it.  
Here is the whole progression.  The background probably would not have occurred to me without the training I received in Advanced Illustration last semester.

And yes, this is almost as much fun as coloring!


Here is the final version.  I printed all the elements out at the highest resolution possible.  I then cut out each item on the outside line.  Those images were positioned on a piece of blue wallpaper from FABMO (in addition to fabric they have wallpaper and tile samples). It was then scanned, turned into a jpeg, and then cropped.  

Hopefully Paganoonoo will be at Puyallup and I will meet you there in 2016!


Thursday, September 3, 2015

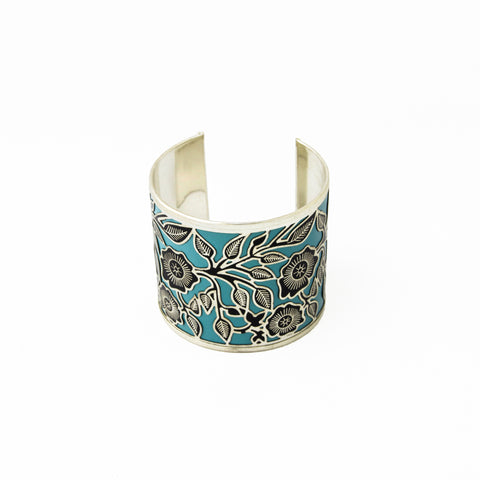
Antoine, Guest Blogger from Vavavida, Artisan Sourced Jewelry


Being ethical is capital

Hi, my name is Antoine owner of Vavavida and I am honored to be able to share my story here. Michelle’s mission for social justice and passion for social entrepreneurship are very much aligned with mine. Both she and I work hard to bring you beautiful, fair and sustainable fashionable products with a story to tell.

Let me tell you the story of a girl I know. Sana is a young woman from a rural and very poor part of India. Being a woman in the rural, severely underprivileged northern part of India is difficult, to say the least.  India ranks 158th out of 168 countries on the gender equality index. 

For Sana growing up, opportunities were bleak so she left school and went to the city as a tween to work and help her family survive. She joined her father and a group of mostly female artisans in a metal casting workshop in the heart of Old Delhi and started working as a jewelry maker for local tradesmen. It’s a physically demanding and delicate job in the best of circumstances. It requires a great deal of skills and hard work over long work shifts. The shop where she worked was small, poorly ventilated, cramped with other artisans and generally unsafe and unsanitary due to a lack of equipment and funds. They were routinely mistreated by their clients, forced to working in unsafe conditions for minimal wages and pressured into delivering tight deadlines. 

Unfortunately, this story is a very common one in India. But where Sana’s story differs from most others is that she was able to find a solution. In 2009, Sana searched and found an Indian importer-exporter of fair trade jewelry with a base in Texas who appreciated their work, skills and designs. 

Sana and her colleagues decided to change their business operations and partner with the importer on a permanent basis. Since applying the fair trade principles to their business model, their lives and livelihoods has tremendously improved. After a few short years of constant personal and professional growth, they were able to take the next step in sustainability and created an evening education program for their members. Sana is now enrolled in that program and she will be the first woman in her community to go to college. She plans on gaining the professional skills that will help her to one day take over her aging father’s place as the head of this successful co-op. 

The reason I know Sana and her story is because we work with her and her family. Although Vavavida does not have a production facility, we work with many artisan co-ops across several continents by purchasing their wares and retailing them. This is why we do what we do. We want to make this success story the rule.

Many studies have demonstrated the importance of women’s access to education for the success of a community. With Women Equality Day just behind us, it’s important to remember that about 70% of the world’s poor are women. In countries like Bangladesh, India and Pakistan, women and girls make up around 70% of the apparel sweatshop workers and are often treated as property rather than as human beings. The Noble Peace Prize winner and Pakistani education activist Malala took a bullet to the head because she wanted to be independent and was outspoken about her right as a woman to go to school.

Breaking away from this situation and replacing it with empowered and educated women may be the most important thing we can do to help a community, a nation and the world grow. Even though women are the most affected by poverty, they are also more likely to raise a community out of poverty. Many developing countries stunt their ability to thrive because girls and women are mistreated, preventing their access to basic education. Sana’s success is a reality and fair trade can be part of the solution.


The simple act of purchasing products from companies that promote women’s rights and education can have a tremendous ripple effect down the line. 

I encourage you to change your shopping habits and be mindful of tag on the item. 

Nowadays, looking good and changing someone’s life for the better has never been so easy.